Evaporated Milk Fudge: An Incredible Ultimate Recipe for Everyone
Evaporated Milk Fudge is a delightful treat that captures the essence of rich, creamy sweetness in every bite. This amazing dessert combines the smooth textures of evaporated milk with a sweet chocolate flavor, offering an indulgent option for any occasion. Whether you are celebrating a birthday, hosting a holiday gathering, or just looking for a sweet companion for your afternoon coffee, this fudge is sure to impress. With its melt-in-your-mouth consistency, it is no wonder that this recipe is a favorite among dessert lovers.
The beauty of Evaporated Milk Fudge lies in its simplicity. Made from a few straightforward ingredients, it is a perfect project for novice bakers and seasoned chefs alike. The process of creating this fudge will warm your kitchen and fill the air with a tantalizing aroma that encourages everyone to gather around and share in the joy of homemade treats. With this guide, you’ll not only learn how to make Evaporated Milk Fudge, but you will also discover why this recipe has won countless hearts.
As we dive deeper, you will find that Evaporated Milk Fudge is much more than just a dessert. It is a form of expression, a way to share love with friends and family. This delectable fudge can also be packaged beautifully, making it an ideal gift for special occasions. So, if you’re seeking a quick treat that delivers big on taste and sentiment, look no further. Let’s unveil the magic of Evaporated Milk Fudge together!
Why You’ll Love This Recipe
The appeal of Evaporated Milk Fudge goes beyond its taste; it’s about the experience of making it and sharing it with others. Here are several compelling reasons why you will adore this recipe:
- Simplified Ingredients – Most ingredients can be found easily in your pantry, making it hassle-free to whip up.
- Quick and Easy – Preparing this fudge takes minimal time, allowing for a fast, delicious treat.
- Perfect for Gifting – This fudge is easy to slice and bundle, making it an ideal gift for friends and family.
- Versatile Flavor Base – Feel free to customize this recipe by adding nuts, chopped fruits, or different extracts.
- Crowd-Pleaser – The creamy sweetness of the fudge appeals to a broad audience, satisfying both young and old alike.
- Memorable Cooking Experience – Making fudge often brings back fond memories, making it a perfect moment to create new ones.
These attributes mean that you are not just making a dessert; you are crafting a delightful experience for everyone involved. The combination of flavors and textures will surely win hearts at any gathering!
Preparation and Cooking Time
Creating Evaporated Milk Fudge is not only rewarding but also efficient. The total time required is approximately 1 hour, which includes both preparation and cooling. Here's a quick breakdown of the timer:
- Preparation Time: 15 minutes
- Cooking Time: 25-30 minutes
- Cooling Time: 25 minutes
These timings may slightly vary depending on your kitchen setup and efficiency, but they provide a solid guideline for planning.
Ingredients
- 1 can (12 oz) evaporated milk
- 4 cups granulated sugar
- 2 cups semi-sweet chocolate chips
- 1 cup unsalted butter
- 1 teaspoon vanilla extract
- 1 cup chopped nuts (optional)
- 1 pinch of salt
Step-by-Step Instructions
Creating your Evaporated Milk Fudge is an enjoyable process. Just follow these simple steps:
- Prepare a Baking Dish: Grease a 9×13 inch baking dish with butter or lined with parchment paper for easy removal.
- Combine Sugar and Butter: In a large saucepan, combine the granulated sugar, unsalted butter, and evaporated milk.
- Heat the Mixture: Stir over medium heat until the mixture comes to a boil.
- Boil for 5 Minutes: Continue boiling the mixture, stirring constantly for about 5 minutes. Watch to avoid burning.
- Add Chocolate Chips: Remove the saucepan from heat and add the semi-sweet chocolate chips, stirring until fully melted and smooth.
- Incorporate Vanilla and Nuts: Stir in the vanilla extract and chopped nuts, if using.
- Pour into Dish: Pour the fudge mixture into the prepared baking dish, smoothing the top with a spatula.
- Cool: Allow the fudge to cool at room temperature for about 25 minutes or until it sets.
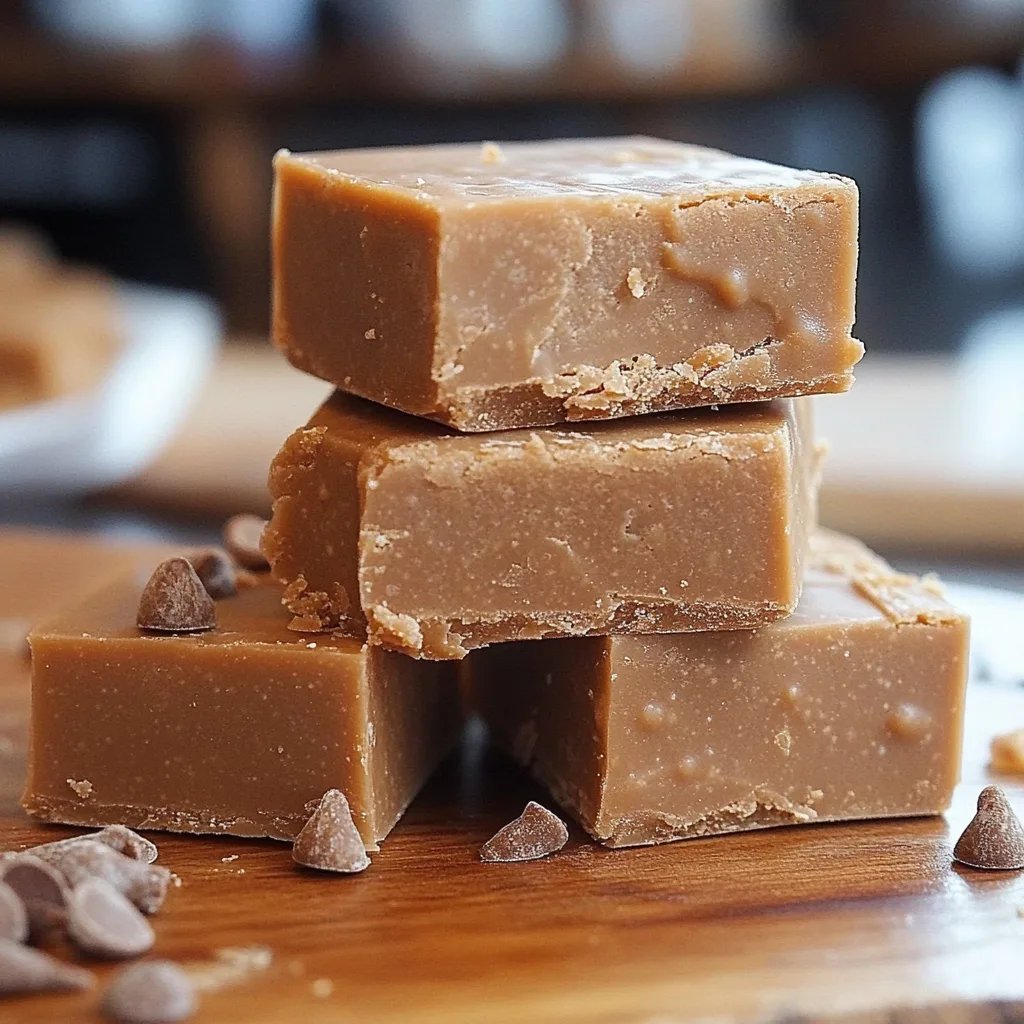
- Slice and Serve: Once set, use a sharp knife to cut the fudge into squares.
These steps will lead you to creating a batch of incredible Evaporated Milk Fudge that will leave everyone asking for more!
How to Serve
When it comes to serving Evaporated Milk Fudge, consider the following tips for an impressive experience:
- Presentation: Arrange the fudge squares on a decorative platter or dessert stand to enhance visual appeal.
- Accompaniments: Consider pairing the fudge with a scoop of vanilla ice cream or fresh fruit for a delightful contrast.
- Gift Option: Wrap the fudge squares in clear bags tied with a ribbon for a charming homemade gift.
- Flavor Enhancements: Dust the tops with cocoa powder, sprinkles, or crushed nuts for an added decorative touch.
With these serving ideas, your Evaporated Milk Fudge will not only taste fantastic but will also create a memorable experience for all who enjoy it.
Additional Tips
- Use Fresh Ingredients: For the best flavor, try to use fresh and high-quality ingredients. Fresh chocolate chips and pure vanilla extract can significantly enhance the taste of your Evaporated Milk Fudge.
- Mind the Heat: When boiling the mixture, keep a close eye to prevent burning. Stir continuously, especially as it starts to thicken.
- Test for Consistency: If you’re unsure if your fudge is ready, drop a spoonful into cold water. If it forms a soft ball that holds its shape, it’s ready to be taken off the heat.
- Add Flavor Infusions: Consider infusing additional flavors by adding a teaspoon of almond extract or espresso powder for a unique twist.
Recipe Variation
Experimenting with your Evaporated Milk Fudge can be both fun and delicious. Here are a few variations to spark your creativity:
- Mint Chocolate Fudge: Add a few drops of peppermint extract to the mixture for a refreshing minty flavor.
- Peanut Butter Swirl: Fold in some creamy peanut butter to the fudge base before pouring it into the dish. This creates a delicious marbled effect.
- Salted Caramel Fudge: Drizzle salted caramel on top of the fudge before it fully sets for an unbeatable sweet and salty balance.
- Coconut Fudge: Mix in shredded coconut for a tropical twist that complements the creamy fudge perfectly.
Freezing and Storage
To keep your Evaporated Milk Fudge fresh and delicious, follow these storage tips:
- Storage: Store the fudge in an airtight container at room temperature for up to one week. To ensure it doesn’t dry out, consider placing a piece of wax paper between layers.
- Freezing: If you want to extend its shelf life, you can freeze the fudge. Wrap it tightly in plastic wrap and then place it in a freezer-safe container. It will last for up to three months in the freezer.
- Thawing: To enjoy frozen fudge, simply transfer it to the refrigerator a few hours before serving. Allow it to come to room temperature for the best texture before indulging.
Special Equipment
While making Evaporated Milk Fudge is relatively straightforward, having the right tools will make your experience even smoother:
- Heavy-Bottomed Saucepan: This will allow for even heat distribution, minimizing the risk of burning.
- Spatula or Wooden Spoon: To stir your mixture thoroughly and ensure all ingredients are smoothly combined.
- 9×13 Inch Baking Dish: This size is perfect for evenly spreading the fudge for a desirable thickness.
- Candy Thermometer (optional): If you're concerned about achieving the perfect candy texture, a thermometer can help you monitor the temperature as it cooks.
Frequently Asked Questions
- What if my fudge doesn’t set?
If your fudge remains too soft, return it to the saucepan and cook it a little longer. Make sure to stir constantly until it reaches the desired consistency.
- Can I use different types of milk?
While evaporated milk is best for achieving that creamy texture, you can experiment with sweetened condensed milk for a different sweetness level.
- How should I cut the fudge for serving?
Use a sharp knife and make clean cuts to create even squares. Warming the knife slightly can help make cutting through the fudge easier.
- Is this recipe suitable for vegan variations?
You can substitute the butter with plant-based margarine and use dairy-free chocolate chips to create a vegan version of this fudge.
Conclusion
Evaporated Milk Fudge is more than just a dessert; it’s a heartfelt treat that brings joy and memories. Its rich flavor, creamy texture, and ease of preparation make it the perfect addition to any festive occasion or a cozy afternoon snack. From its humble ingredients to its beautiful presentation, each step in making this fudge is an opportunity to create connection and comfort. Whether you choose to keep it for yourself or share it with loved ones, you can be sure that this indulgent treat will create moments that linger long after the last bite is enjoyed.