Gluten Free Strawberry Bars: An Incredible 5-Step Recipe
Gluten Free Strawberry Bars are the perfect dessert for anyone seeking a sweet treat that meets dietary needs. Packed with fresh strawberries and enveloped in a delicious gluten-free crust, these bars are sure to impress your family and friends. The balance of sweetness and tartness from the strawberries creates an amazing flavor explosion that is both refreshing and satisfying. Perfect for summer picnics, afternoon snacks, or even dessert, these bars are not just another gluten-free option; they are a delightful indulgence.
Imagine biting into one of these bars—the sweet aroma of strawberries wafts through the air as you take your first delicious bite. Every mouthful brings a burst of juicy fruit and a satisfying crunch from the crust. Whether you’re gluten-intolerant or simply looking to indulge in a healthier dessert, these bars are a fantastic choice you won’t want to miss. As we delve into the recipe, you’ll discover why this treat is not only delicious but also simple to make!
Get ready to elevate your dessert game with Gluten Free Strawberry Bars that are incredibly easy to make. In this guide, you will learn how to create these scrumptious bars at home, why you’ll love them, and some clever serving suggestions. Let’s jump into the world of gluten-free baking!
Why You'll Love This Recipe
There are numerous reasons to adore these Gluten Free Strawberry Bars. Here are just a few highlights:
- Easy to Make: With just a few steps, you can have these bars ready to enjoy in no time.
- Fresh Ingredients: Using fresh strawberries not only enhances the flavor but also ensures a healthy treat.
- Versatile: You can customize these bars to your liking by adding nuts or other fruits for a unique twist.
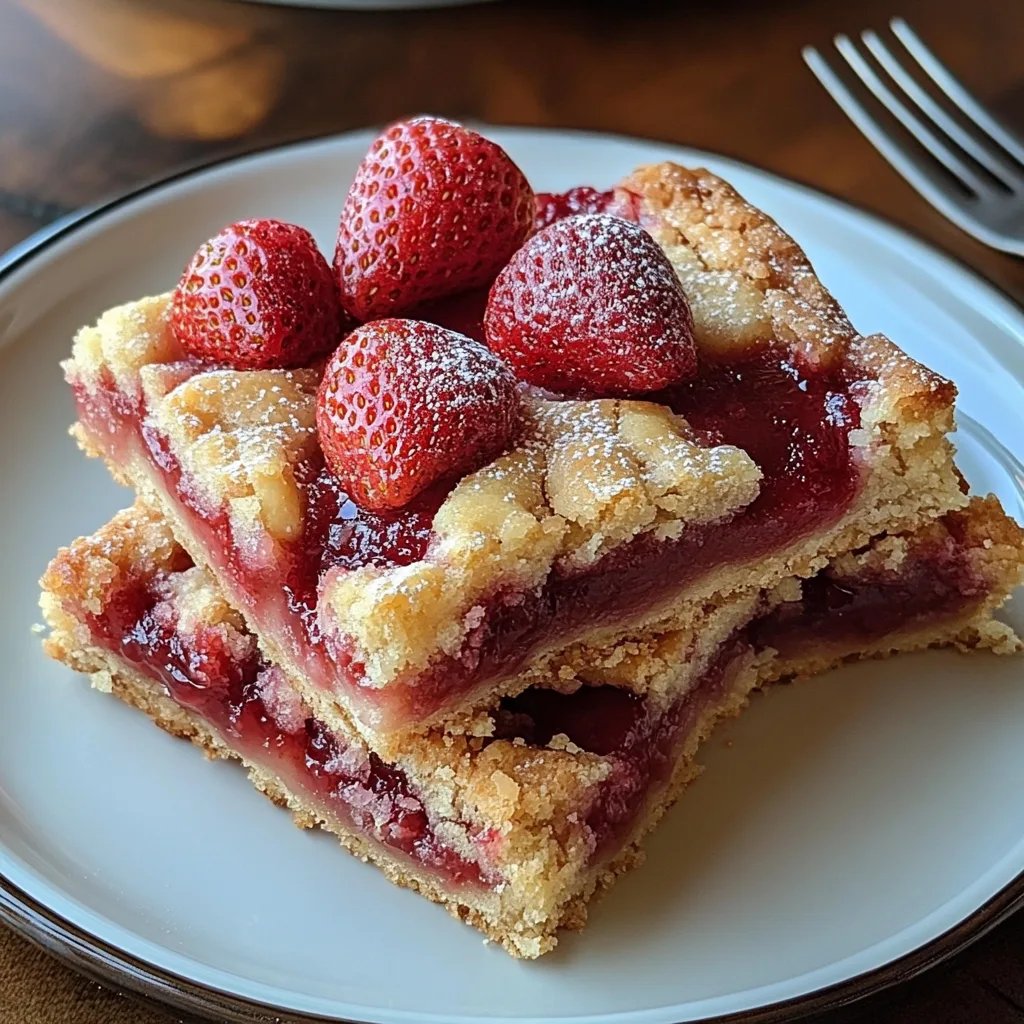
- Appealing Texture: The combination of a crunchy crust with a soft strawberry filling creates a delightful contrast.
- Eye-Catching Appearance: These bars are visually stunning and perfect for presentations at gatherings.
- Diet-Friendly: These bars cater to gluten-free diets without sacrificing taste, making them suitable for everyone.
These factors combine to make this recipe a reliable favorite. With each bite, you’ll find the sweet and tangy notes of strawberries perfectly complemented by a crumbly base.
Preparation and Cooking Time
Creating Gluten Free Strawberry Bars is efficient, allowing you to prepare a delightful dessert in under an hour. Here’s a breakdown of the time required:
- Preparation Time: 15 minutes
- Cooking Time: 30-35 minutes
- Cooling Time: 15-20 minutes
This means you will have delicious bars ready to serve in about an hour.
Ingredients
- 2 cups gluten-free oats
- 1 cup almond flour
- 1/4 cup coconut oil (melted)
- 1/4 cup honey (or maple syrup for vegan option)
- 1/4 teaspoon sea salt
- 1/2 teaspoon baking powder
- 2 cups fresh strawberries (hulled and sliced)
- 2 tablespoons cornstarch
- 1 tablespoon lemon juice
- 1 teaspoon vanilla extract
Step-by-Step Instructions
Making these delectable Gluten Free Strawberry Bars is a straightforward process. Follow these steps:
- Preheat the Oven: Preheat your oven to 350°F (175°C). Grease a square baking pan (about 8×8 inches) with cooking spray or line it with parchment paper.
- Make the Crust: In a medium bowl, combine gluten-free oats, almond flour, melted coconut oil, honey (or maple syrup), sea salt, and baking powder. Mix until well combined, creating a crumbly consistency.
- Press the Mixture: Pour half of the oat mixture into the prepared baking pan. Press it evenly into the bottom to form a crust.
- Prepare the Strawberry Filling: In another bowl, mix sliced strawberries with cornstarch, lemon juice, and vanilla extract. Ensure the strawberries are well coated.
- Layer the Filling: Spread the strawberry mixture evenly over the crust in the baking pan. Sprinkle the remaining oat mixture on top to create a crumbly topping.
- Bake: Place the pan in the preheated oven and bake for 30-35 minutes, or until the top is lightly golden and the filling is bubbly.
- Cool: Remove the pan from the oven and let it cool for about 15-20 minutes before cutting into bars.
- Slice into Bars: Once cooled, cut the mixture into squares or rectangular bars and serve.
How to Serve
Serving your Gluten Free Strawberry Bars can be just as delightful as making them. Here are some ideas:
- Plate Presentation: Arrange the bars on a beautiful serving platter. A touch of greenery, like mint leaves, can enhance the presentation.
- Add Accompaniments: Serve with a dollop of whipped cream or a scoop of vanilla ice cream for an extra indulgent treat.
- Drizzle Option: Consider drizzling a bit of chocolate or caramel sauce over the top for an added touch of sweetness.
- Pair with Beverages: Pair your bars with refreshing iced tea, lemonade, or even a nice cup of coffee for an afternoon snack.
- Store Properly: If you have leftovers, store the bars in an airtight container at room temperature for up to three days or refrigerate for longer freshness.
Through these serving suggestions, you can create an enjoyable experience for your guests while showcasing the quaint charm of these bars. Enjoy your delicious creation, delighting in both flavor and texture!
Additional Tips
- Use Fresh Strawberries: For the best flavor, choose ripe strawberries in season. Their natural sweetness will enhance the overall taste of your bars.
- Adjust the Sweetness: Depending on your preference, feel free to modify the amount of honey or maple syrup. Start with less and taste as you go.
- Make Ahead: These bars can be prepared in advance, stored, and served later, making them perfect for gatherings or potlucks.
- Experiment with Flavoring: You can add a pinch of cinnamon or a splash of almond extract to the crust for a delightful twist.
Recipe Variation
Explore different flavors and ingredients with these variations:
- Berry Medley: Substitute half of the strawberries with blueberries or raspberries for a mixed berry delight.
- Peanut Butter Swirl: Add a swirl of creamy peanut butter on top of the strawberry filling before baking for a nutty flavor.
- Coconut Crust: Incorporate unsweetened shredded coconut into the crust for a tropical flair.
- Chocolate Drizzle: Melt dark chocolate and drizzle it over the bars after cooling for a rich finish.
Freezing and Storage
- Storage: Store your Gluten Free Strawberry Bars in an airtight container. They can last at room temperature for about three days. However, refrigeration may enhance their freshness and can extend their shelf life to up to a week.
- Freezing: If you want to keep them longer, you can freeze the bars. Cut them into squares and wrap each piece tightly in plastic wrap before placing them in a freezer-safe container. They can be stored for up to three months. Thaw them in the refrigerator before serving.
Special Equipment
To successfully make Gluten Free Strawberry Bars, the following kitchen tools are helpful:
- Mixing Bowls: Various sizes for mixing ingredients and preparing the crust and the filling.
- Baking Pan: An 8×8-inch square baking pan is ideal for this recipe.
- Parchment Paper: Helpful for easy removal and clean-up after baking.
- Spatula: Perfect for spreading the filling and crust evenly.
- Measuring Cups and Spoons: Essential for accurate ingredient measurements.
Frequently Asked Questions
Can I substitute different fruits?
Absolutely! You can use other fruits, such as peaches or apples, while adjusting the sweetness as necessary.
Are these bars suitable for vegan diets?
Yes! Simply replace honey with maple syrup and use a suitable vegan butter alternative for the crust.
How can I tell when the bars are done?
The bars are ready when the top turns lightly golden and the filling is bubbling. You can also insert a toothpick; it should come out mostly clean.
What’s the best way to cut the bars?
For clean slices, use a sharp knife and wipe it clean between cuts. This prevents sticking and ensures a neat presentation.
Do I need to let them cool completely before slicing?
It’s best to let them cool for at least 15-20 minutes to set properly, but you can serve them warm if you prefer.
Conclusion
Gluten Free Strawberry Bars are not only simple to prepare but also an irresistible treat that everyone will love. Their fresh flavor profile blends the sweetness of strawberries with a crunchy crust, resulting in a dessert that pleases all palates. Whether served at a picnic or enjoyed as an afternoon snack, these bars are sure to impress. Don't hesitate to try out the variations and serving suggestions to make your own unique creation. You’ll soon discover that these delightful bars will become your go-to dessert recipe!