Hot Cocoa Fudge: An Amazing Ultimate Recipe You Need to Try
Hot Cocoa Fudge is an amazing treat that encapsulates the warmth of winter in each rich, chocolaty bite. This delightful dessert combines the beloved flavors of hot cocoa with the indulgence of fudge, creating an irresistible sweet experience. Imagine cozying up by the fireplace, wrapped in a blanket, and savoring a bite of this incredible treat. It’s perfect for holiday gatherings or simply as a delightful snack on a cold day.
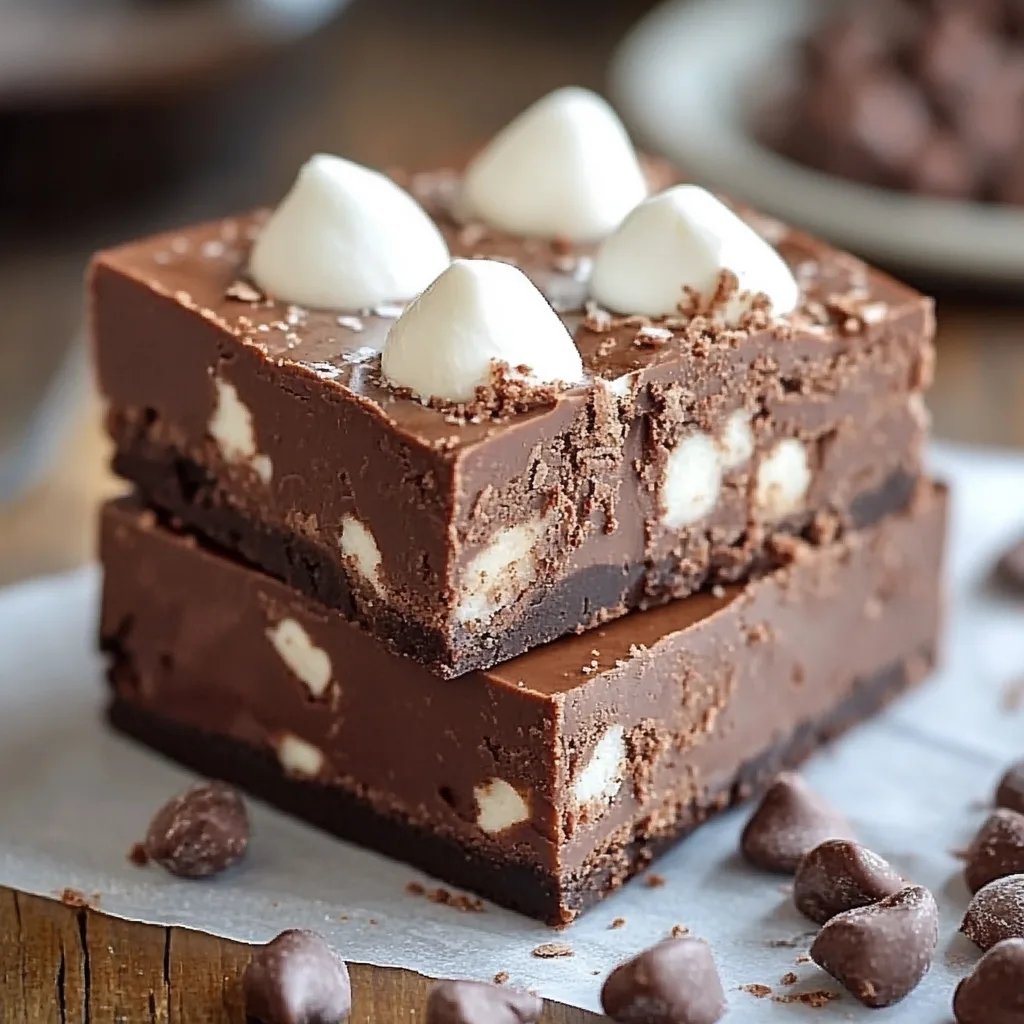
If you’ve ever enjoyed a cup of hot cocoa, then you can only imagine how much more satisfying it is when transformed into fudge. Each piece evokes fond memories of winter warmth, friendship, and togetherness. The creamy chocolate melts in your mouth while the mini marshmallows add a delightful texture that reminds you of the perfect cup of cocoa. In this guide, you'll discover how to make Hot Cocoa Fudge, why this recipe stands out, and top tips on serving it. Whether you're a beginner or a seasoned baker, this easy-to-follow recipe will impress everyone in your household.
The recipe not only provides an incredible chocolate flavor but is also simple to make. Its rich, decadent texture makes it a favorite among chocolate lovers, ensuring that it disappears quickly from any dessert table. After one taste, you will agree that Hot Cocoa Fudge is truly a must-try recipe this season.
Why You’ll Love This Recipe
Hot Cocoa Fudge isn’t just delicious; it’s also a versatile and fun treat to make. Here are several reasons why you’ll fall in love with this recipe:
- Quick and Easy – This recipe requires minimal effort and time, making it perfect for busy schedules.
- Great for Sharing – Whether for holiday gifts or parties, this fudge is an excellent shareable treat.
- Decadent Flavor – The rich chocolate flavor combined with marshmallows creates a truly unique indulgence.
- Customization – Feel free to add your favorite mix-ins like nuts or flavored extracts for a personal touch.
- Kid-Friendly – This fun recipe is great to prepare with family, making it a perfect activity for kids.
- All-Year Treat – While ideal for winter, this fudge can be enjoyed anytime you crave something sweet.
These attributes contribute to making Hot Cocoa Fudge a beloved recipe you'll find yourself returning to time and again.
Preparation and Cooking Time
Making Hot Cocoa Fudge is a quick culinary adventure that won’t take much of your time. Here's a quick overview of how long it will take:
- Preparation Time: 15 minutes
- Cooking Time: 10 minutes
- Cooling Time: 2 hours (or until fully set)
This means that within just over two hours, you can have a delicious batch of fudge ready to go!
Ingredients
- 2 cups semi-sweet chocolate chips
- 1 can (14 oz) sweetened condensed milk
- 1/4 cup unsweetened cocoa powder
- 1 teaspoon vanilla extract
- 1 cup mini marshmallows
- 1/2 cup crushed graham crackers (optional)
- Pinch of salt
Step-by-Step Instructions
Creating Hot Cocoa Fudge requires just a few simple steps. Follow this easy guide to achieve delicious results:
- Prepare Your Pan: Line an 8×8-inch baking dish with parchment paper, leaving an overhang for easy removal.
- Melt Chocolate: In a medium saucepan over low heat, combine the chocolate chips and sweetened condensed milk. Stir constantly until the chocolate is melted and the mixture is smooth.
- Mix in Cocoa: Remove the saucepan from heat. Stir in the cocoa powder and a pinch of salt until fully combined and smooth.
- Add Flavor: Mix in the vanilla extract, blending until everything is well incorporated.
- Fold in Marshmallows: Gently fold in the mini marshmallows and crushed graham crackers if using.
- Spread in Dish: Pour the fudge mixture into the prepared baking dish. Spread evenly using a spatula.
- Set the Fudge: Allow the fudge to cool at room temperature for about 10 minutes. Then, place it in the refrigerator for at least 2 hours until set.
- Cut and Serve: Once set, lift the fudge out of the baking dish using the parchment overhang. Cut into squares.
By following these steps, you’ll have an amazing treat ready to share with family and friends!
How to Serve
Presenting your Hot Cocoa Fudge well can enhance the indulgence. Here are some tips for serving:
- Presentation: Place the fudge squares on a decorative platter for an inviting look. Consider dusting with powdered sugar for added flair.
- Toppings: Serve alongside a drizzle of warm chocolate sauce or caramel for an extra decadent experience.
- Beverage Pairing: Complement the fudge with a steaming cup of hot cocoa or coffee for a complete treat.
- Gift Idea: Package fudge squares in festive boxes or bags for a charming homemade gift.
With these serving ideas, your Hot Cocoa Fudge will impress everyone at your gathering or bring joy as a delightful gift. Enjoy the blend of flavors and the joy it brings!
Additional Tips
- Choose Quality Chocolate: Using high-quality semi-sweet chocolate chips will significantly enhance the flavor of your Hot Cocoa Fudge.
- Experiment with Mix-Ins: Feel free to get creative! Adding ingredients like peppermint extract, crushed candy canes, or different types of nuts can add a delightful twist.
- Cut Smaller Pieces: Fudge is rich, so cutting it into smaller pieces makes it more enjoyable for your guests.
- Use Food Coloring: For a fun presentation, consider adding food coloring when folding in the marshmallows for a festive look.
Recipe Variation
Mix things up and try these variations for your Hot Cocoa Fudge:
- Peanut Butter Fudge: Swirl in creamy peanut butter before the fudge sets to create a delicious chocolate-peanut butter combination.
- Nutty Delight: Incorporate a half-cup of chopped nuts, like walnuts or pecans, for added texture and flavor.
- Mint Chocolate Fudge: Add a teaspoon of peppermint extract to the fudge mixture for a refreshing minty flavor, perfect for the holiday season.
- Dairy-Free Option: Substitute chocolate chips and sweetened condensed milk with dairy-free versions for a vegan-friendly treat.
Freezing and Storage
- Storage: Keep your Hot Cocoa Fudge in an airtight container at room temperature for up to one week.
- Freezing: For longer storage, cut the fudge into squares and place them in a single layer in a freezer-safe container. It can be frozen for up to three months. Just make sure to separate layers with parchment paper to prevent sticking.
Special Equipment
To successfully prepare Hot Cocoa Fudge, you will need the following tools:
- Medium Saucepan: For melting the chocolate mixture.
- Spatula: Essential for mixing and spreading the fudge evenly in the pan.
- Baking Dish: An 8×8-inch baking dish lined with parchment paper will do the trick for easy removal.
- Refrigerator: Essential for cooling and setting the fudge properly.
Frequently Asked Questions
1. Can I make Hot Cocoa Fudge without marshmallows?
Yes, you can omit the marshmallows if you prefer a smoother texture. Alternatively, use larger marshmallows for a gooey texture.
2. How do I know when the fudge is set?
The fudge is ready to cut once it has cooled in the refrigerator for at least two hours and has firmed up completely.
3. Can I serve Hot Cocoa Fudge warm?
While it’s best served chilled, you can gently warm small squares in the microwave for a delicious melty treat.
4. What’s the best way to cut the fudge?
Use a sharp knife to cut the fudge into squares. A warm knife (run it under hot water) can help create cleaner cuts.
5. Can I add flavored extracts?
Absolutely! Feel free to experiment with different extracts such as almond or orange for a unique twist.
Conclusion
Hot Cocoa Fudge is a beloved dessert that captures the essence of warmth and sweetness in every delicious bite. With its creamy texture and rich chocolate flavor, it's no wonder that this recipe has become a favorite for many. Whether you're preparing it for a festive gathering, a cozy night in, or as a thoughtful gift, this fudge is sure to bring joy to everyone who tastes it. With the simple steps and tips provided, you'll be on your way to creating an irresistible treat that will have friends and family asking for seconds.